With the changing scenario in the online world, adding watermarks to blog images has become a very important factor. Images without Watermarks generally result in copying of images which may result in the end of professionalism on your blog. And thus, adding Watermarks is extremely important.
Today, you get 100s of resources that can easily help you add watermarks. MS PowerPoint, which is the mos widely used software for creating powerful presentations, one the other hand, can also be used to add attractive watermarks to your images. Never imagined such a thing? Have a look at this simple tutorial where I’m teaching the exact process to add watermarks using MS PowerPoint on your blog!
How to Add Watermarks using MS PowerPoint
Step #1. In order to add a watermark, firstly open a blank PowerPoint Document.
Step #2. Then, click on the insert tab, navigate to the image group and click on Picture. Add the picture to which you want the watermark to be added.

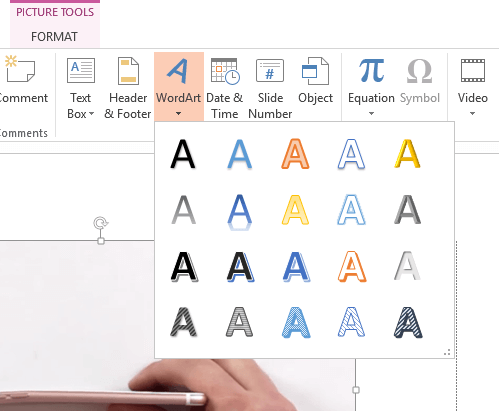
Step #3. Let us take the example of one of the images of my previous post. Navigate to the photograph you added, click on it and select WordArt from the TEXT group.
Step #4. In the text group of insert ribbon, click WordArt and choose the style of the watermark you want to add.

Step #5. Type the text i.e. your blog URL in the box as the watermark, change its font size and drag it to the place you want (by default, it’ll be at the center).

So by following these 5 simple steps, you can add a watermark to your blog’s image but below, checkout how you can format the watermark you added earlier in the image and how to add watermark to other image instantly.
How to format the Watermark added to the image?
Step #1. First of all, click the watermark you added.
Step #2. After clicking on it, navigate to the drawing tab and click the WordArt Style box.

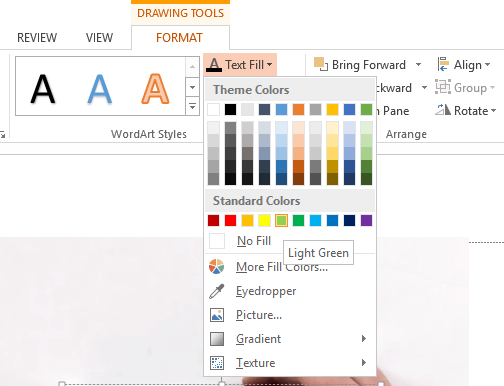
Step #3. Click on text fill and choose the color you want to set in the transparency watermark.

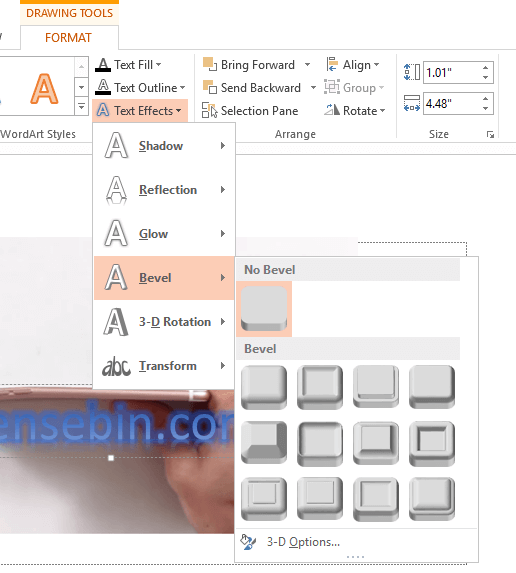
Step #4. To customize the watermark further on, click on text effects and add your favorite effect to the watermark then and there.

So here was my short yet informative tutorial (I think it is…) I hope you guys enjoyed it and will definitely apply it further on your blogs. Happy bloggers’ life.
Leave a Reply